
C. FINK, M. HERBORT, P. GFÖLLER, C. HOSER
124
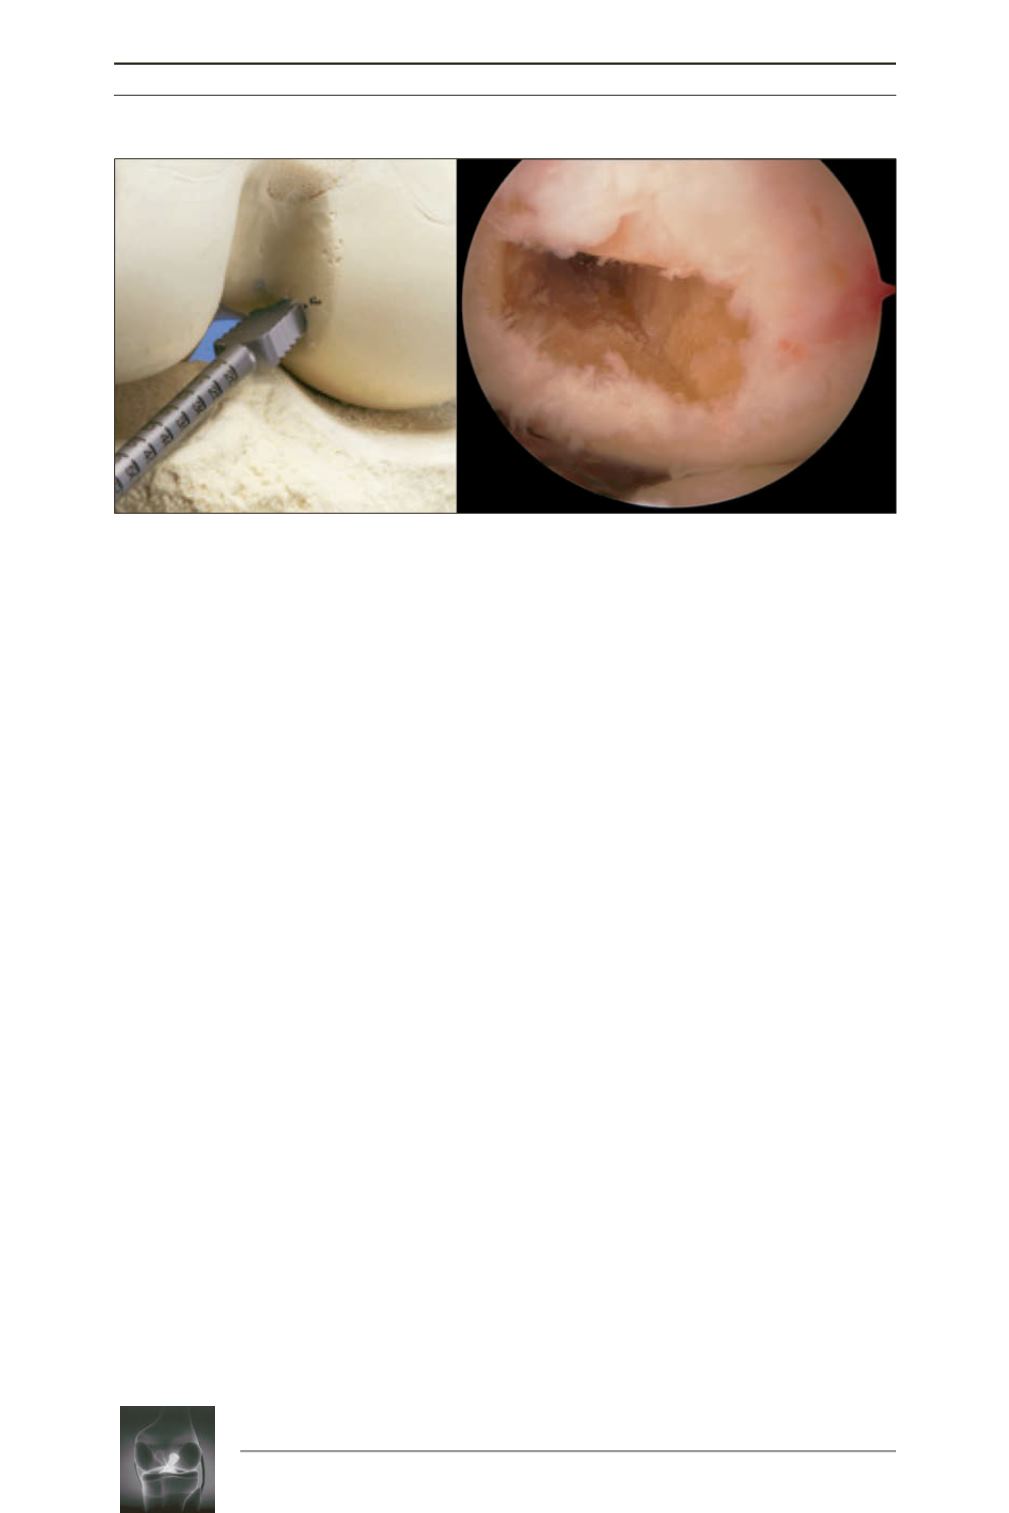
smooth surface of the rasp should face the
posterior cruciate ligament to protect that
structure from injury. A socket is formed by
driving the rasp in slowly to a depth of
approximately 25-30 mm (1 cm longer than the
bone plug). The rasp is then tapped back out,
and if necessary a dilator of the same
dimensions is inserted using the same
technique.
Tibial Bone Tunnel
The tibial drill guide is introduced through the
medial arthroscope portal. Then a vertical or
horizontal skin incision approximately 1.5 cm
long is made medial to the tibial tuberosity. The
first guide wire is now drilled in through the
center of the drill sleeve, and its relation to the
roof of the intercondylar notch is evaluated by
extending the knee. If the wire is correctly
placed, the guide sleeve is removed and a
cannulated 10 mm (or 12 mm) drill bit is
advanced over the wire. It is predrilled to a
depth of 0.5-1 cm to create a countersunk bed
for the later placement of an EndoTack® (Karl
Storz, Germany). Now the drill sleeve is
reintroduced and fixed securely in the predrilled
hole. Depending on the position of the first
guide wire in relation to the notch roof, a
second guide wire is drilled in parallel to the
first at a slightly more anterior or posterior site.
Next, each wire is overdrilled with a 5 mm drill
bit (for a planned 5.5 x 9.5 mm tibial tunnel) or
a 5.5 mm drill bit (for a 5.5 x 10.5 mm or
12.5 mm tibial tunnel. Both wires are removed,
and any bony bridges that remain between the
drill holes are disrupted with a shaver. Now a
guide wire is inserted for orientation purposes,
and a rasp of the correct width (8 or 10mm) is
carefully driven into the tunnel. Finally a tibial
dilator of the appropriate size is carefully
tapped into place to complete the tibial tunnel
(fig. 5).
Since the placement of a rectangular tibial bone
tunnel is more technically demanding, a
conventional round tunnel may also be created.
Fig. 4:
The rasp (8 or 10 x 5 mm) is driven into the bone tunnel with the knee flexed approximately 110°. The
instrument should be parallel to the tibial plateau, and its smooth surface should face the posterior
cruciate ligament.


